How to Get the Best Product Photography Setup
If you click to purchase a product or service based on our independent recommendations and impartial reviews, we may receive a commission. Learn more
They say a picture is worth a thousand words and when it comes to the product photography on your website, a picture may well be worth a thousand purchases.
Why? Because great product photography is essential if you want to convince users to convert into customers. While shopping online is convenient, it can be hard to replicate the experience of seeing products in person before making a purchase.
High-quality images of your products, therefore, help to create a shopping experience that is as close to visiting a brick-and-mortar store as possible.
In this article, we’ll take a look at the best product photography setup you can use to get amazing pictures of your items, helping to convert customers.
Why Product Photos Matter
If a customer has purchased from your store before, they already know what to expect when it comes to the quality of your products. However, new customers, or customers who are buying a different item from before, don’t have this intel.
High-quality product photographs help to provide customers with a strong idea of what to expect from your products. They allow users to see exactly what the item looks like and they’re a great way to get familiar with colors and sizing without having the physical item in front of you.
Great product photos help to catch the attention of users. In the same way that visual merchandising encourages customers to make a purchase in a physical store, product images do just that for online shoppers.
Good product photography can also help to improve the overall user experience of your website and the images you use will act as a direct reflection of your brand.
The Types of Product Photography
There are various types of product shots you can take to showcase your items to potential customers.
Individual Product Photos
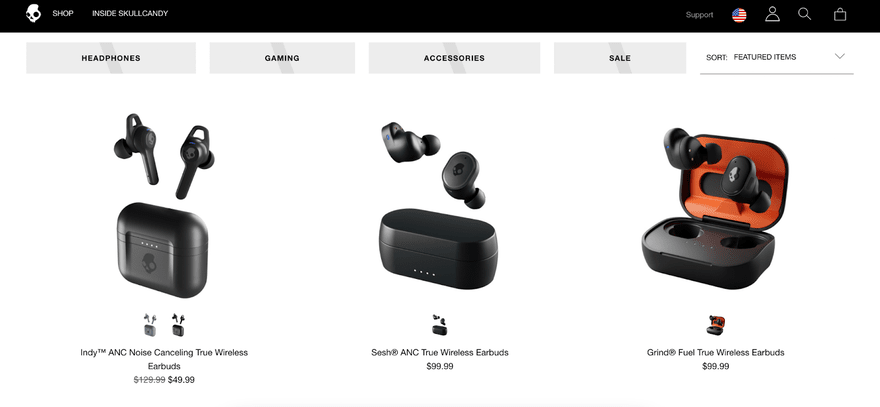
Individual product photos are one of the most popular types of product photography and include just the product. Usually, with a white background, these images focus purely on the specific item and will include various angles and views of the product. Individual product photos are usually used for product listings on your website.

Lifestyle Photos
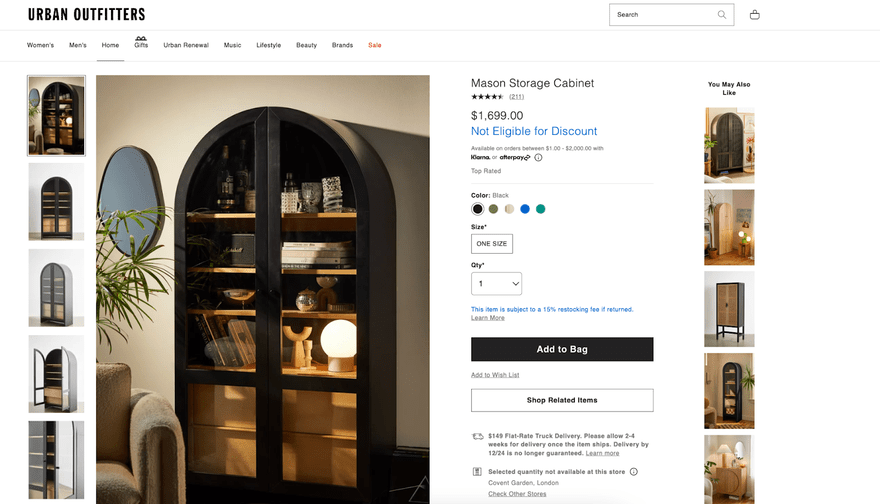
Lifestyle photos show your products in action. These types of product photos show customers how they can use your products and how the item will fit into their lifestyle. Often featuring a model using or wearing the item, lifestyle shots are popular for social media and marketing purposes.

Group Product Photos
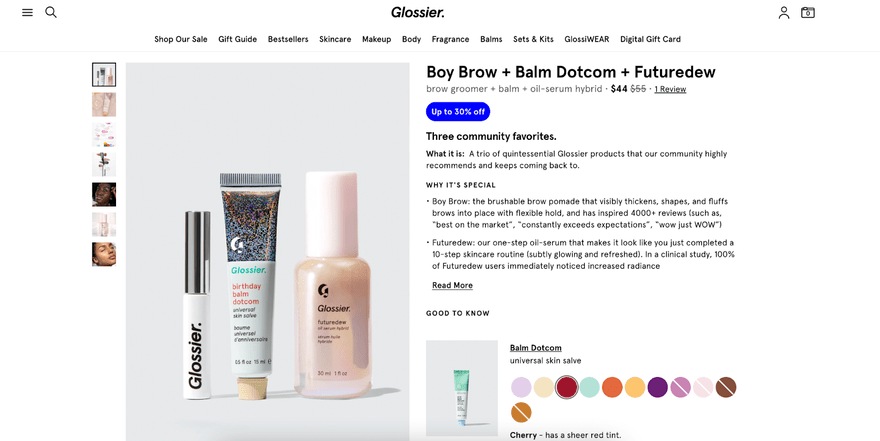
As the name suggests, group product photos showcase more than one item in the same image. Often used for kits or bundles, group images showcase the full range of products available and provide users with an overview of your offering. They’re useful to use if you’re offering customers a bundle or multiple product deals.

Packaging Photos
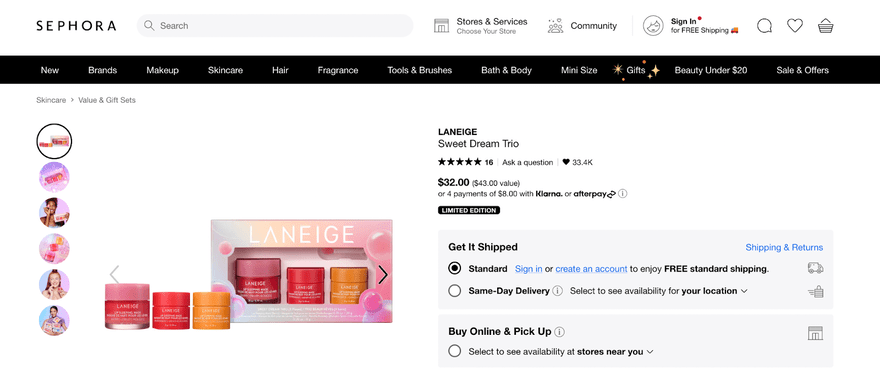
We may be told to not judge a book by its cover but shoppers will often judge a product by its packaging. Packaging photos feature not just the item but the packaging it comes in too, giving users a sense of the overall shopping experience they can expect from your brand.

Photography Set Up: What You Need
Below we’ve listed everything you need as part of your product photography set up to make sure you can take the very best photos of your products.
Camera
The first thing you need to take product photographs is a camera. Depending on your budget, there are various types of cameras you can choose from.
If you have the budget to invest in a DSLR camera, models such as Canon and Panasonic have great mid-range options that allow you to adjust your settings to get the best results. You can also opt for specific lenses to achieve your desired shots.
Nowadays, smartphone cameras give professional digital cameras a run for their money and you may find that experimenting with your iPhone gives you the product image quality you need.
Tripod
Tripods are an essential part of your product photography setup since they help to minimize camera shakes and ensure the configuration of your image is perfect.
A tripod helps to keep your camera steady and ensures you’re always shooting from the same angle, allowing you to focus on the products themselves.
Whether you opt to use a professional camera or your smartphone, a tripod should definitely be included as part of your photography setup.
Lighting
Taking the time to get your product photography lighting setup just right is important. Bad lighting can totally ruin your images.
Natural light is often the best for shooting images, but we can’t always rely on the sun to show up which is where artificial lighting comes in.
From small lamps to large professional lights and lightboxes, there are options to suit every budget and lighting need.
Advice from the Experts
Top Tip: It’s important to try and make sure the lighting is the same across all of your product imagery to help create brand consistency. We recommend using the same lighting source at the same time of day to photograph your products and avoid relying on natural light where possible.
Backdrop/Location
The backdrop or location of your images will depend on the type of product photography you have chosen to create.
If you’re shooting individual or group shots we recommend using a white sheet as your image background. You can pick up rolls for as little as $5 online and using sheets will help to ensure consistency and pure white color.
Advice from the Experts
Top Tip: If you’re using a specific location for lifestyle shots, be sure to plan ahead and check out the location’s lighting before you arrive. Also, always check the background for any items that need removing from the shot.
Models
If you want to include models within your product photography images then you’re going to need to source them first!
Sourcing models is actually pretty simple. Firstly, decide what type of model you’re looking for. Be sure to choose models who reflect your target audience and the type of people you’re aiming your products at.
When it comes to finding models to feature in your photos you can turn to a modeling agency that will have various models on their books to choose from. Of course, this will involve a fee including covering the cut to the agency too.
If you’re looking to keep costs low, turn to your family, friends, and any members of your team for help. Providing the images include real people in natural poses, your audience won’t be able to tell if the photo features a professional model or your Uncle Steve!
Software
You can also invest in software to help elevate your product photography setup. Most brands use editing software in post-production to ensure their images are as perfect as possible.
Editing software allows you to alter aspects such as lighting and shadows or remove any marks or background items that you may not have noticed during the shooting process.
There are loads of different editing software available depending on both your budget and skill level. For beginners with a limited skill set, we recommend using the online software Canva, while more advanced editors with a larger budget should opt for Adobe Photoshop.
Check out our guide to editing your photos online for free for more editing tips and tricks.
Product Photography Setup Tips
One of the most common reasons for people to return an item they bought online is because it doesn’t look like the image used on the product listing. To help avoid this, be sure to follow these product photography setup expert tips and tricks.
- Shoot from multiple angles to get the best view of your products and to provide customers with an extensive overview of the item.
- Use a mixture of product photography images including individual images and lifestyle shots. This gives you more freedom to choose the right images for different platforms to showcase your products.
- Optimize your images for your website. Ensure file sizes aren’t too big and that they won’t slow down the speed of your website. Also, remember to include alt text for accessibility and SEO purposes.
- Consider hiring some help to get your product photography just right. This could be anything from models to feature in your images, a professional photographer, or a lighting assistant. You can also hire an editor who can make your images shine in post-production.
- Make sure your products remain the focus of your images. It’s no use shooting a product image if the item is shoved in the background. The product in question should always be the main focus of the photograph, even if there are other elements in the shot too.
Product Photography Tips: Summary
All of the best ecommerce websites have a strong focus on excellent product photography. No matter what your company size or budget is, investing time and money into good product photography is essential if you want users to convert into customers.
As this article has shown you, however, you don’t always have to turn to a professional to get amazing photographs of your product range.
In fact, if you follow the steps and tips laid out in this article, you’ll be able to shoot high-quality and engaging images that will grab your target audience’s eye and convert them into customers.
Creating your own product photography also gives you total control over how your brand is presented to your audience.
Now, there’s nothing left for you to do but pick up your camera and start shooting. Be sure to let us know in the comments if you found this article helpful and how you get on!


Leave a comment